Sunday, December 18, 2005

'Noson Gyflaith' - Welsh toffee making


Early on Christmas morning Welsh Protestants held a carol service known as 'plygain' (as opposed to the Catholic Mass). This service could take place as early as 3 a.m. and might well last several hours. Plygain apparently means 'before cock-crow'. In order to stay awake until it was time to go to church/chapel, one activity that was traditionally practiced was toffee making. Noson Gylfaith means Toffee Evening.

As an aside, the word toffee is comparatively new (19th century), and in Wales the sweet would have been known as cyflaith, ffanni, and most commonly taffi (taffy). American-English uses the word 'taffy'. Taffy is generally pulled, whereas toffee (as the English make it) is generally poured out and left to set. In Britain the word toffee now appears to be used to describe both forms.

Toffee Evening was a sociable occasion. Family and friends would gather to boil up a pan of sugar and butter, and then take it in turns to 'pull' the toffee. The strands of toffee would curl and were supposed to reveal the initials of your true love. Pulling toffee was quite a skill, so if you wanted to manipulate your toffee into the initials of someone you had your eye on, then you had better get some practice in on the sly. Alternatively, the pulled toffee would be chopped up into shorter mouth-sized lengths.

I was keen to try making some homemade toffee, but I was a bit intimidated by the idea of using my hands to work with the molten sugar straight from the pan. Still, what's Christmas without a bit of trauma. Here goes...

My recipe comes from the website of St Fagans National History Museum. I have halved the quantity of ingredients to:

675g soft brown sugar
225g salted butter
juice of 1/2 lemon
1/8 pint of boiling water

I followed the instructions given on the St Fagans website (first melt the sugar in the water, then add the lemon juice and butter), but I had the benefit of a sugar thermometer to help me judge when the target temperature had been reached. A watched pan of boiling sugar does take an age to reach the temperature, so patience is definitely needed for this. As I am not very patient I spent my waiting time browsing through cookbooks to find any last minute advice on toffee pulling. Help came in the form of the Roux brothers' book on Patisserie. In it is advice on working with sugar to create fanciful decorations for patisserie - poured, blown, pulled and spun sugarwork. One of the Monsieur Rouxs advises using a palette knife to start working with the hot sugar after it has been poured out onto a greased (ideally marble) surface. The coolness of the surface begins to lower the temperature of the toffee/sugar. He then writes, 'Now your fingers can hold the mass without making contact with the marble. After two or three minutes, hand and sugar are finally and completely united; they seem to have attained precisely the same temperature. The sugar bends, takes on a satin sheen. Suddenly it sings, it makes a slight cracking sound, it talks to you. Proud, beautiful, docile, it is now ready to be shaped into flowers, leaves, animals, what you will.'

By now I was looking forward to listening to my toffee sing, and lo and behold it was time to take the pan off the stove.

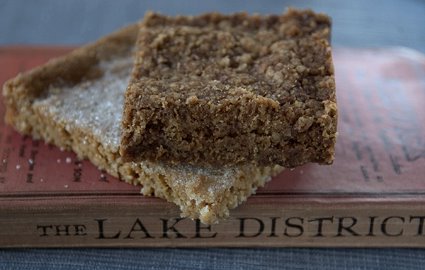
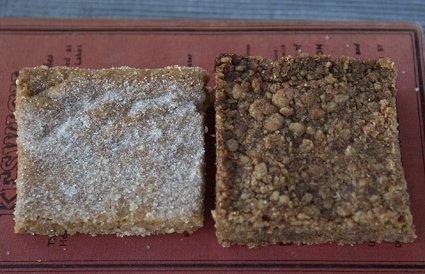
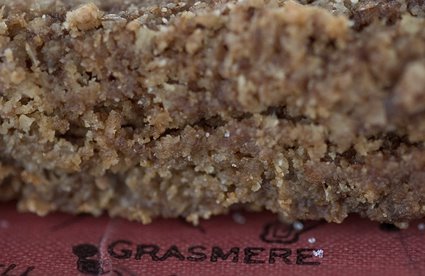
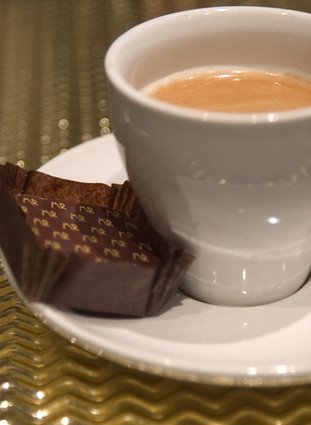
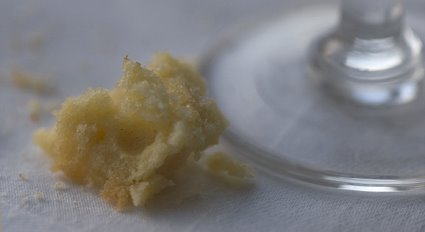
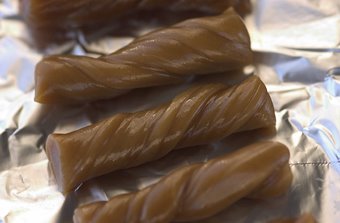
I poured some of my hot toffee onto a buttered plate, and the remainder went into a greased tin (a back-up plan). I used a palette knife to start moving the toffee around, and then plunged in with my fingers. Once you have picked up some of the toffee and started manipulating it, the heat dissipates fairly rapidly. The toffee becomes more elastic and less fluid the more you stretch it. The colour of the toffee lightens as you incorporate air, and becomes a lovely creamy coffee colour. Once I got the hang of the pulling I was then a bit stumped as what to do with my pulled toffee. I twisted some of it, and cut it into smaller pieces.


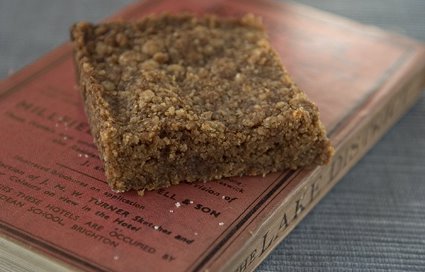
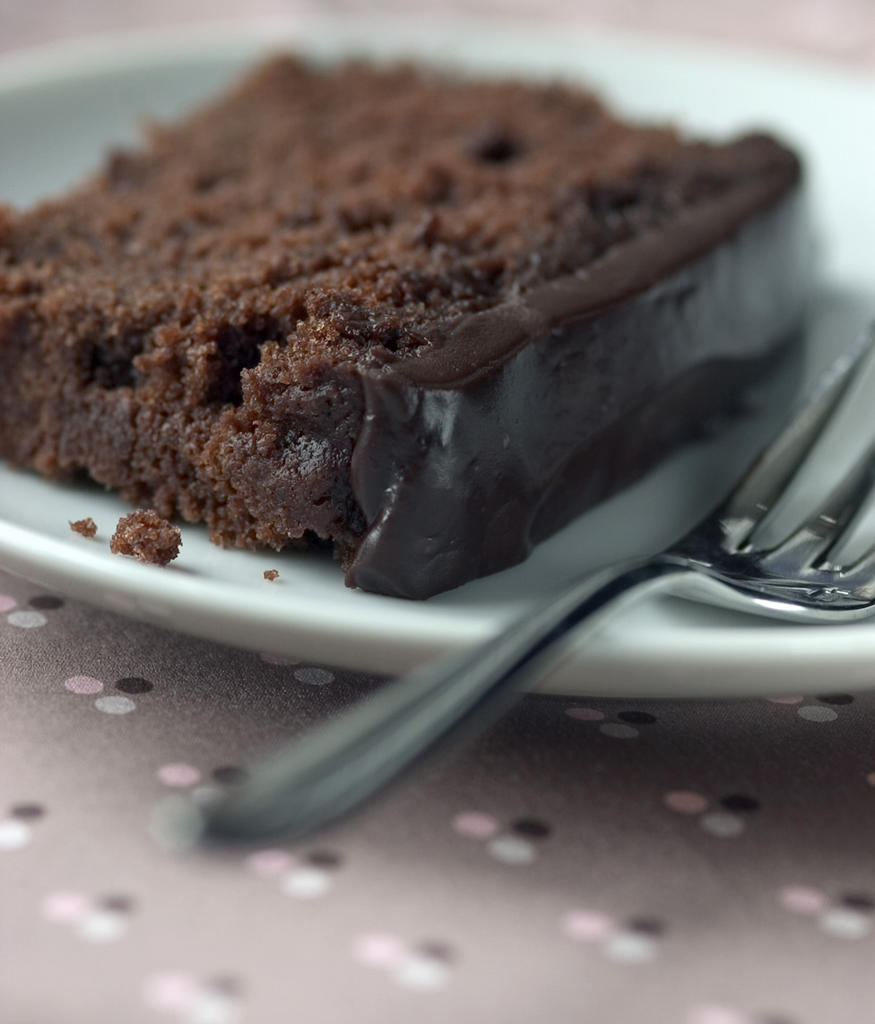
By complete chance, the initial spelt out in curly toffee was that of my husband, and a heart-shape also formed (see top of posting).

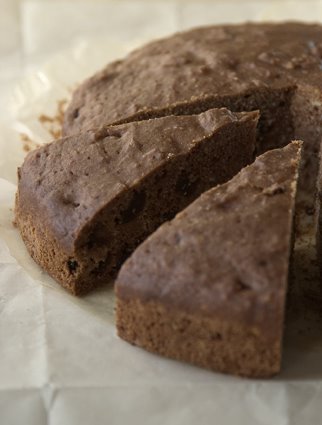
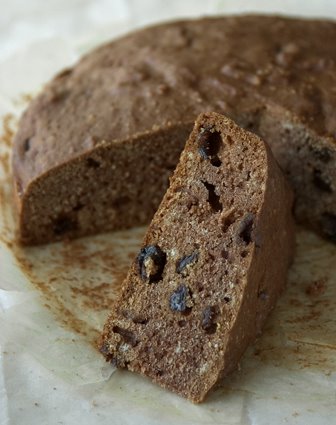
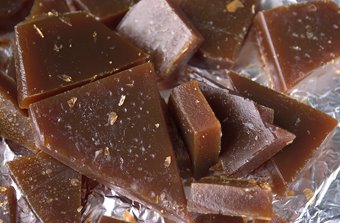
The toffee in the tin I marked out into squares once the mixture had cooled sufficiently. The tin then went outside the back-door, to take advantage of the chilly air to assist further cooling (but I kept an eye out for pesky London squirrels, who will make off with anything that isn't bolted down).


Once cool (and retrieved from the squirrels), I attempted to snap the toffee along the pre-scored lines. Some of the toffee was obedient, and on other sections it seemed more likely that my fingers would be doing the snapping, so I let it break freestyle. Large pieces of splintered toffee do look more attractive, but they can be rather big to get in your mouth in one go.


The pulled toffee had a softer consistency and was an easier chew. The poured toffee gave a better mouth and jaw workout (but don't tell your dentist). What intrigued me was how the Welsh could spend hours singing carols, after an evening of making and consuming toffee. After a couple of pieces, my teeth were fair stuck together and I was reduced to loud humming. Perhaps these things happen for a reason?

With best wishes for a Happy Christmas.

For information on other Welsh Christmas traditions and to hear some plygain singing, click here.

Sunday, December 04, 2005

Mince Pies (pre-Christmas baking)


Mince pies have been associated with Christmas since at least the 17th century. In 1662 Samuel Pepys wrote a diary entry for the 6th of January of an evening's repast with his friend Sir William Penn. Sir William served Pepys 'a good chine of beef and other good cheer, eighteen mince pies in a dish, the number of years that he [William] has been married.'

From the date (6th January), it sounds as if Pepys may also have been participating in another tradition associated with mince pies; that of eating one a day over the twelve days of Christmas (which run until the 6th of January). The custom is that each pie is meant to bring you happiness for a month, so if you have eaten the full quota then a happy year is on the cards. You are supposed to eat each mince pie as the guest of a different household.

Earlier in the 17th century the Puritans banned mince pies (along with many other things) as symbols of indecent excess. They felt that Christmas celebrations were getting out of hand, and that the true significance of Christmas was being overlooked. In 1644 they passed an Act of Parliament that banned Christmas celebrations, although no doubt some more discreet pleasures (such as food) continued to be observed. With the Restoration in 1660 came a return to pre-Puritan festivities, so Samuel Pepys was partaking in the renewed enjoyment of dishes such as mince pies. For the Scottish the ban on Christmas celebrations came even earlier, with the ousting of the Catholic Church in 1583, and was continued by the Presbyterians right through into the 20th century. See this site for more information.

The mince pies we eat today have an ancestry reaching back to Medieval times. During the Medieval period meat and fish pies were often sweetened with dried fruits, sugar and spices. A small pie known as a 'chewette' was based either on meat or fish, depending on whether it was a fasting (non-meat) day or not. These pies were enriched with fruits and spices. The Medieval cook had a fondness for using such ingredients, most likely because of their 'exotic' nature, just as we today like to seek out ingredients from across the globe. In the 16th century similar pies were known as 'shred', 'shredded' or 'minced' pies - names that described the preparation of the meat content. From the mid 17th century onwards the meat content of the pies gradually reduced, although Mrs Beeton writing 200 years later gave a recipe for mincemeat based on mutton. In 2005 the majority of the mincemeat spooned into our mince pies is meat-free, but much still includes beef suet - and so we continue to eat the distant relations of the Medieval chewette, and the Tudor shred(ded) pie.

I have eaten many a mince pie, but had never experienced a mince MEAT pie, so for this posting I decided to try the original formula. For my pies I used a mincemeat recipe from the 21st century foodie and chef Hugh Fearnley-Whittingstall. Hugh is a great fan of British beef and his Christmas recipes make good use of the meat. He rates his meaty mincemeat pies as the best he has eaten. I have to confess that the thought of mincing up a raw, bloody steak and mixing it with dried fruits and spices, and then putting it into a jar to 'mature', did seem a little queer. I make a batch of mincemeat each year, and love the way the kitchen becomes scented with warm and delicious smells; not this time though. Perhaps it was the thought of bottling up raw mince that was off-putting. I followed Hugh's advice to double the amount of brandy in the recipe, which should allow it to be stored for up to a year! I also added a dash of whisky (for luck).

...well, does this say 'mince pie' to you?

I made the mincemeat a month ago, and have had it in the fridge maturing. The unmistakedly red raw mince content quickly darkened in colour, and the overall look of the mincemeat now looks unintimidating. It is a fairly dry looking mixture, unlike the mincemeat I normally produce, which has a lot more apple in it and even more booze! I gave it a good sniff when I opened the jar and was pleased to remain on my feet. Sadly, this also meant that the spices give a much subtler scent than my previous mincemeats. Nothing left to do but taste it. I made up a batch of shortcrust pastry and rolled out my pie cases.


I spooned a small (teaspoon) amount of the mixture into each case. Jane Grigson carries a recipe for Mrs Beeton's Mincemeat in her book 'English Food', and she warns against overfilling because when the suet melts the filling can overflow the case. Normally I would put more than a teaspoon of mincemeat into each pie, as I think otherwise the pastry can dominate the eating of them.

Pies baked - all still looking innocuous. No overflows of beef fat or other unpleasantness.


So, were the pies worthy of a festive feast, or should they be fed straight to the dog? There certainly was no hint of the beefy element, and the more subtle flavouring and not so in-your-face sweetness made them seem a lot more sophisticated than the usual mince pie. Mince pies do tend to be filled with sickly sweet mincemeat, and these are quite different. If you don't normally like mince pies then you might take more favourably to these. I did think that they needed more filling to them as the pastry slightly overwhelmed. My shortcrust pastry was plain. I think that the next batch should be made with a sweetened pastry.

...a 'topless' pie - to show the appearance of the cooked mincemeat

Did this baking make me feel all festive and full of good cheer? Frankly, I try and save myself until the last few days before the 25th of December, as my good cheer will be very strained if it has to last a whole month. However, in the hope of a great 2006 I think there is no harm in eating one or two mince pies ahead of time just on the off-chance they bring good fortune. May your mince pies make all your dreams come true.

Sunday, November 20, 2005

Grasmere Gingerbread from Cumbria


Today is 'Stir-up Sunday', the traditional day for making your Christmas pudding to give it time to mature. I shall be in Portugal this Christmas, so will not be making a pudding this year (not that it is an annual event in this household). Instead I will be making something sweet and spicy, just the thing for a frosty day in London.

Grasmere is a small town within the very beautiful English Lake District, in the county of Cumbria. Cumbria was formed in 1974 from the old counties of Cumberland and Westmorland, and parts of Lancashire and Yorkshire. The food heritage of Cumbria is therefore also that of these older regions.

On the north-east coast not far from Grasmere are the ports of Whitehaven and Milnthorpe. From the 16th and 17th centuries both were involved in trade with the Caribbean. In the 18th century Whitehaven was the third largest port in Britain, only London and Bristol were larger. Spices, unrefined sugars and rum were brought to port, and these commodities became ingredients in the food of the region. Gingerbreads are made throughout the north of England, but what makes the gingerbread of Grasmere different is that it resembles a crumbly biscuit rather than a cake (or bread).

In 19th century Grasmere gingerbread was used as a payment to rush bearers (usually children) who furnished the local church of St. Oswald with rushes to cover the unpaved floor. When the floor was finally paved there was no longer a need for the rushes, but they were still brought into the church for decoration and for display at festivals. The gingerbread likewise became associated with special events in the church calendar, such as the feast of St. Oswald on August 5th.

The poet William Wordsworth and his sister, Dorothy, lived in Grasmere during the first years of the 1800s. Dorothy Wordsworth records in her journal a trip to buy gingerbread (an old-style blog!). The gingerbread for sale locally was available in either thin or thick forms; the Wordsworths set off to buy thick, but could only find thin (just an excuse to eat twice as much by my reckoning).

In 1854 a Grasmere lady by the name of Sarah Nelson started making her own version of gingerbread based on Lancashire recipes. She needed to boost her family's income, and decided that baking was the way forward (how right). Her (top-secret) recipe was a run away success and is still baked today and sold in the shop that Sarah set up. Sarah Nelson's name has become a trademark, and her gingerbread is probably the biscuit which most people think of when they think of Grasmere gingerbread. Even Tom Cruise has eaten it.

The oldest recorded recipes for Grasmere gingerbread make use of oatmeal or ground oats (a locally grown cereal). I am going to bake two batches of gingerbread - the first will follow the older form of the recipe and include oatmeal and flour in equal measure. The dry ingredients are mixed with melted butter and it is sweetened with light brown soft sugar. I have decided to make this into a thin biscuit.

The second recipe uses flour only, into which butter is rubbed. This recipe includes a small amount of golden syrup, which means that the recipe can only date from the 1880s when golden syrup was first produced as a by-product of sugar refining. The gingerbread also uses a dark brown sugar so the biscuit will have a darker colour than the first. I am going to make this second gingerbread thicker than the first.

Both recipes are from Jane Grigson's 'English Food' book (pp340-341).

RECIPE NO.1 :

250g plain flour or fine oatmeal (or 125g of each - which is what I did)
125g pale soft brown sugar
1 teaspoon ground ginger
1/4 teaspoon baking powder
150g lightly salted butter

1. Preheat oven to 180C/350F/Gas mark 4.
2. Line a oblong tin with baking parchment - mine was roughly 19.5cm by 29.5cm and was as deep as a swiss-roll tin.
3. Mix the dry ingredients together.
4. Melt the butter and add to the dry ingredients.
5. Spread the mixture over the tin in a thin layer, pressing it down lightly.
6. Bake until golden brown - about 30/35 minutes.
7. Mark into squares/rectangles as soon as you have taken the tin from the oven, but allow to fully cool in tin before removing gingerbread.


RECIPE NO.2:

250g wholewheat flour
1/2 teaspoon each of bicarbonate of soda and cream of tartar
3 generous teaspoons of ground ginger
175g butter
150g soft dark brown sugar
1 dessertspoon of golden syrup

1. Preheat oven to 160C/325F/Gas mark 3.
2. Line a square cake tin - mine was approx. 21cm sq.
3. Sift the flour, bicarbonate of soda, cream of tartar and ground ginger into a bowl.
4. Rub in the butter, then add the sugar and the golden syrup.
5. Press the mixture into the tin (the mix is fairly dry and crumbly looking but don't panic!).
6. Bake for 45-50 minutes, until golden brown.
7. As above, mark out the biscuits as soon as the tin comes out of the oven, but then leave to cool. Both sets of biscuits harden as they cool.


The resulting biscuits were quite different. Recipe no.1 produced a biscuit (on the left in the image below) which was very buttery with a subtle ginger flavour. The biscuit was crisp and the texture was quite open and crumbly. I liked the inclusion of the oatmeal, and felt that this added to the consistency of the biscuit. Very nice.


The biscuit from recipe no.2 (on the right in the above image) was much denser, with a slightly chewy centre. The flavour was deeper, with the fireyness of the ginger coming through strongly. I found that this biscuit dried out too much around the edge of the tin, so the baking time could have been reduced slightly. I prefered the 'bite' of the first biscuit, and the simplicity of the recipe will certainly ensure that I bake it again! Both biscuits would be just the thing after a long day hiking around lakes or up a mountain or two, or tucked into a lunchbox to enjoy halfway through the journey. My journey today was from the kitchen to the sofa, but that didn't dent my appreciation!

Sunday, November 13, 2005

1916 Trench Cake - Remembrance Sunday


This posting is perhaps as good an example of 'baking for Britain' as you can get. The recipe is from Elizabeth Craig's book 'Economical Cookery', first published in 1948. Ms. Craig was a prolific writer of cook-books from the 1930s through to the 1960s. The necessary restrictions practiced during both World Wars meant that she was in a position to be quite an expert on economical cookery. The recipe entitled '1916 Trench Cake', is no doubt included in this volume as the enormity of both World Wars would still be fresh in the minds of most people, and of course rationing was still in place post-World War II. The cake contains no eggs, and has a modest amount of cocoa powder to add a touch of luxury (and extra calories) to a fruit cake which was destined for the boys on the front line during World War 1.

225g plain flour
110g margarine
75g currants
2 teaspoons cocoa
1/2 teaspoon baking soda
75g brown sugar
1 teaspoon vinegar
1/4 pint milk
Suggested extra flavourings - nutmeg, ginger, grated lemon rind (I used a pinch of ground nutmeg and 1/2 teaspoon ground ginger)

1. Preheat oven to 180C/350F/Gas 4. Grease and line your cake tin (don't use anything too large as the above quantity of ingredients makes up a fairly scant volume of mix - my tin was 18cm diameter and this was a bit too big).
2. Rub the margarine into the flour. Add the other dry ingredients and mix well.
3. Add the soda to the vinegar and milk, and then quickly add to the dry ingredients. Beat well and then turn into the tin.
4. I found my cake was baked in about an hour, but the recipe suggests up to 2 hours.

All parcels sent from home to the trenches in France must have been much appreciated for the contact they gave soldiers with loved ones, but one can imagine how much a young man must also have enjoyed a chance to vary his rations with something as modest, but otherwise unobtainable, as a slice of home-made cake. Food served to soldiers in the trenches generally consisted of bread (stale by the time it reached the front line), hard biscuits (inedible unless soaked), bully beef (similar to corned beef), tinned butter, tinned jam, tinned pork with beans (beans with a piece of pork fat on top). Soldiers may have been able to buy food locally to add to these rations. Those who could afford it had hampers sent out to them from Harrods or Fortnum & Mason(!), but such luxury was beyond the means of the average Tommy.

The army recognised the importance of postal deliveries to troop morale and packages sent from home could expect to reach soldiers in France or Belgium within two or three days, and a week to ten days reach the front line. A fruit cake, well wrapped, would travel well and stay fresh. Such was the comradeship between the men, that the contents of any parcel would be shared out. Cigarettes were handed round, new socks passed onto a man whose own had fallen to pieces, and a cake like this would have been divided up and shared.


To test the keeping power of this recipe I baked the cake last Sunday, and stored in wrapped in foil within a plastic cake box. Unfortunately when I came to taste it I did find it a little dry, but this may well be the nature of the cake. The margarine rubbed into the flour didn't combine too well with the other ingredients, so the sponge was speckled with paler flecks. The small amount of cocoa powder helped the colouring, and the dash of spice lifted the flavour. However, my real reason for baking the cake was not to test the recipe, but as a modest act of remembrance.


In memory of my great-grandparents who served in the 1914-1918 war:

My maternal great-grandad Frederick William Smith (father to my grandma), served with the Royal Norfolk Regiment in the First World War in France and was taken prisoner. He died on 18 October 1926.

My other great-grandad on my mother's side was William Holway Pitts. He joined the Territorial Army pre-war and served in the Royal Devon Regiment. As he worked in the Post Office before the war he served behind scenes doing postal duties for the Army. He became a Sergeant.

On my father's side, great-grandad James John Graham Coggin, born 1870, served and survived without injury. When the war started he would have been 44. He was by occupation a baker and confectioner, so was in a civilian job that had to continue. At some point in the conflict he volunteered for the army, and we believe he was sent to the Dardenelles / Gallipoli region.

Herbert Sydney Salmon, my father's grandfather on his mother's side, had been in the army and served in South Africa in the Boer Wars. He was born in 1876 so would have been of a suitable age, and taking into account his military experience is likely to have served again.

Fortunately all four men returned home safely.

Sunday, November 06, 2005

Remember, remember the 5th of November...

...For my first meeting with other UK food bloggers. A rendezvous set up by Sam of Becks Posh Nosh (Sam is a Brit abroad, but she was in the UK over the last few days along with boyfriend Fred), so a big THANK-YOU is due to her! Nine of us (ten including Fred) met in Gordon's Wine Bar, just off the Strand in central London. We all enjoyed a glass or two of wine together, and a chat. I was delighted to meet Andrew of Spittoon (thank-you for your nice comments about my fledgling site), Celia of English Patis, Christina of The Thorngrove Table, Jeanne of Cook Sister, Johanna of Passionate Cook, Keiko of Nordljus, Nick (Monkey Gland) of Jam Faced, and of course Sam and Fred.

Sam very kindly bought us all a gift all the way from San Francisco. A sampling of two exquisite chocolates from chocolatier Michael Recchiuti. This was such a nice thing to do that I thought the chocolates deserved some blog space to themselves.

First, there was the cute little box (the best things come in these...):


Then the box opened to reveal its delectable contents:


Burnt Caramel, Michael Recchiuti's signature flavour. His initials decorate this chocolate:


So I made myself an espresso - a suitably dark and bitter flavoured companion to this chocolate:


Then one thing led to another - the second chocolate is Lemon Verbena infused ganache, enrobed in a delicate shell of bittersweet chocolate:


Dammit, where did they go?

Wednesday, November 02, 2005

Trifle, or Madeira Cake recycled

Taking my inspiration from the title of the cookbook 'Economical Cookery' (Elizabeth Craig, 1950), I turned some of my less than perfect Madeira cake into four small trifles. Being the thrifty housewife I made use of ingredients from my storecupboard for this exercise in economy: tinned raspberries (in juice), blackcurrant jelly, Bird's custard (in a carton), double cream (fresh). The tinned raspberries I usually stick on my porridge, for which they are fine. In the trifle they looked anemic and they didn't have the same consistency as fresh fruit (OK they were a bit mushy, but set into the jelly I don't think they were too awful). The cubes of Madeira cake stayed pretty firm even after a good soaking with raspberry juice, so was a pretty good choice of sponge for trifle making. Anything topped with custard AND cream is usually fairly edible, and so these trifles proved to be. I shall return to Ms. Craig's book for a posting in the near future.

Sunday, October 30, 2005

Madeira Cake (with a glass of Madeira)


A slice of wine and a glass of cake. No, that's not quite right. A slice of cake and a glass of wine. What's not to like about that combination? You can tell I am already excited at the prospect, and I am not sure which I am looking forward to most. I bought a bottle of Malmsey (sweet Madeira wine) a couple of weeks ago, following a visit to Vinopolis, the wine museum near to the delights of Borough Market, London. I love Madeira, as well as sweet dessert wine (Tokaji - mmmm), and a good glass of Port. The best of them are rich with sugared fruit and spice flavours, and are like drinking a distillation of the most delicious Christmas cakes and mince pies that you have ever tasted. Malmsey is really an after-dinner drink - apparently Verdelho Madeira (medium-dry) is really the one to drink with cake - but I am sure that on this occasion it will do nicely.


So the purchase of a bottle of Blandy's Alvada 5 Year Old Rich Madeira was the inspiration for this posting. Madeira cake is not exported from the island of Madeira along with the drink, but is a butter and egg rich sponge cake, flavoured with lemon zest, supposed to be very well suited to eating alongside a glass of the aforementioned. Madeira cakes of this type date from the nineteenth century, and are eaten throughout Britain. Madeira wine has been imported into the country from at least the 1600s (legend has it that the Duke of Clarence - brother to Richard III - was drowned in a vat of Malmsey at the Tower of London in 1478).

The combination of wine with cake was first partaken of by genteel persons (mainly ladies) during the eighteenth century. The upper classes rose from their beds well after day break and had their first meal of the day (breakfast) fairly late in the morning or perhaps even after noon. Dinner (the main meal of the day) was taken early to mid-evening, and then a light supper might be enjoyed before bed-time. This meant that there was potentially quite a spell between breakfast and dinner, long enough to make me feel light-headed at the very thought of it. In order to keep the wealthy and delicate from keeling over, an additional light meal was eaten by some (and I'm sure that you could have counted me in on it). This new meal was called luncheon or lunch. The working classes had eaten a meal to serve a similar purpose from the Middle Ages onwards, but their snack was along the line of bread with ale. Georgian ladies would have instead eaten dainty cakes or sandwiches, and drunk either wine or tea. Moving into the nineteenth century lunch became established as a meal with its own time slot at mid-day, and the food eaten was more substantial, although the evening dinner was still the main meal of the day. The cake and wine/tea combination became a snack offered to and shared with visitors, whether they called mid-morning or mid-afternoon. A great incentive to visit your relatives or neighbours!

My recipe for Madeira cake came from Jane Grigson's English Food:

175g butter
175g caster sugar
275g flour (plain)
1/2 teaspoon baking powder
4 large eggs
Grated rind of half a lemon
2 strips of lemon or citron peel (used for decoration)

1. Preheat oven to 180C/350F/gas mark 4.
2. Grease and line a cake tin (20cm/8inch).
3. Cream the butter and sugar together until mixture is light and fluffy, and your arm is heavy and weak.
4. Sift the flour and the baking powder in a bowl.
5. Beat the eggs into the butter and sugar, adding each separately with a little flour to stop the mixture splitting.
6. Stir in the rest of the flour and the grated lemon rind.
7. Put the mixture into the prepared tin, and bake for between 1 1/2 hours and 2 hours. After 1 hour place the two pieces of lemon or citron peel on top of the cake, and continue baking.

NB. I found that my cake was ready not long after an hour had passed, and it ended up a little too browned. Keep an eye on the performance of your own oven. The surface of my cake was cracked, and the application of decorative peel simply looked as if I was trying to distract the eye from the error, so I removed it.


According to the Good Housekeeping Cookery Book, if a cake has a peaked, cracked top it is a sign that either the oven was too hot; the cake was too high up in the oven; or the mixture may have been too dry or the tin too small. My suspicions lie with the oven as I have noticed my cakes tend to brown before they have finished cooking. Next time I make a cake I shall try the lowest shelf rather than the middle one.

Unfortunately after removing the cake from the tin, I discovered that the surface browning also extended to the sides and underneath of the cake. The Good Housekeeping Cookery Book had a recipe for Madeira cake which baked at the same temperature as Jane Grigson's, but the recipe recommended a baking time of 1 hour, rather than up to 2. I think my cake ended up on the overcooked side. For the photo I did trim a little off the base of the cake, and I suppose it doesn't look TOO bad. The sponge was a bit dry, and rather dull. The slice was best eaten from the inside out, and the 'crust' left at the side of the plate. The glass of Madeira was sorely needed to boost proceedings. If the cake were to be moister, and there was more of a hint of the lemon zest to the flavouring, then I think this cake could be quite nice. I can see how it provides a foil to the in-your-face sweetness of the Madeira wine. In the meantime I will pour myself another glass and have a think about what I can do with the rest of the cake...

Sunday, October 23, 2005

Banbury Cakes from Oxfordshire


Banbury, Oxfordshire, may be a familiar place name to those who know the children's verse:

'Ride a cock-horse to Banbury Cross,
To see a fine lady upon a white horse,
With rings on her fingers and bells on her toes,
She shall have music wherever she goes.'

The town still retains its landmark cross, although the Puritans pulled down the original. The cross today stands in the middle of a traffic roundabout, and was erected in 1859 to commemorate the wedding of the then Princess Royal to Prince Frederick of Prussia.

Banbury cakes although not mentioned in the well-known verse, have become just as much of a symbol of the town. They have been made there from at least the early seventeenth century. At one time they were exported to places as far afield as India, Australia and America. A modern local newspaper makes use of the name as its title.

The cake shop in Banbury most closely associated with the cakes for many years was known as The Original Cake Shop, at 12 Parsons Street. The building dated back to the seventeenth century, and this served as a cake shop until it unfortunately fell into disrepair and was demolished in 1968. Also well known was Betts' Cake Shop at 85 High Street, run by a great grand-son of Betty White who set up The Original Cake Shop. See also the second postcard on this page.

There are many recipes for the cakes. The earliest one I could find via the internet is that from Gervase Markham's 'The English Hus-Wife' of 1615:

'To make a very good Banbury Cake, take four pounds of Currants and wash and pick them very clean, and dry them in a cloth; then take three Eggs, and put away one yolk, and beat them, and strain them with Barm, putting thereto Cloves, Mace, Cinamon and Nutmegges, then take a pint of Cream, and as much mornings milk, and set it on the fire till the cold be taken away; then take Flower, and put in good store of cold butter and sugar; then put in your eggs, barm, and meal, and work them all together an hour or more, then save a part of the paste, and the rest break in pieces, and work in your Currants; which done, mould your Cake of whatever quantity you please, and then with that paste which hath not any Currants, cover it thin, both underneath, and aloft. And so bake it according to bigness.'

This recipe would make something closer to an enriched sponge or bread, with a piece of dough containing currants sandwiched between two currant-free pieces of dough. The modern version of the recipe uses puff pastry, and the filling is a mixture of currants, peel and spices. The recipe used today in Banbury town is a secret, but is said to also include rum and brandy. The cakes have a distinctive shape, a pointed oval shape marked with three cuts.


I have to confess that I started off by following what claimed to be the recipe from Gervase Markham's 1615 instructional book (having at that point not seen a transcript of the original), but when I started weighing out the ingredients and I was a bit concerned by the small amount of currants for a 500g weight of pastry, that I went back to the computer to do a hasty bit of extra research. The recipe I had started following is here. If you click on the link you will also see a small illustration of the cakes, which are alongside a specially shaped basket used for transporting the cakes.

So having discovered that the 1615 recipe was not made with puff-pastry (perhaps I should have guessed that?), but having bought said pastry and already rolled it out, I decided to press on with the adapted recipe. I too had to tweak the recipe to work with a slightly smaller quantity of pastry. I used a proportionally larger amount of dried fruit because I didn't want the cakes to all pastry and no filling.

My recipe went like this:

375g puff-pastry
35g melted butter
160g of mixed dried fruit and peel (super handy bag from Julian Graves)
1/2 teaspoon ground allspice
1/2 teaspoon ground nutmeg
1/4 teaspoon ground cinnamon
30g caster sugar (and some demerara for sprinkling)
1 dessert spoon of rum (shamefully I had to use Bacardi)
1 egg white

1. Pre-heat the oven 220C/425F/Gas 7.
2. Dig out a baking sheet and either grease or cover with a non-stick liner (what a great invention).
3. Roll out the pastry thinly (mine was pre-rolled - how lazy is that. In my defense the pre-rolled stuff was on buy-one-get-one-free at Waitrose).
4. Cut into circles. My recipe suggested 18cm/7 inch circles (i.e. draw around a saucer), but that would have used all my pastry up with three cakes. I found a small bowl in the drawer and drew round that. Even so I only managed eight circles.
5. Mix together the butter, dried fruit, spices and sugar, and put a small amount of this into the middle of each circle. Don't get too carried away else the filling will be too big for the cake.
6. Bring up the sides of the circle so that it looks as if you are creating a mini Cornish pasty. Crimp the edges together firmly, and then turn the cake over so the seam side is down. Press down on your cake to flatten it slightly. Put onto baking sheet.
7. When all your cakes are assembled brush with the egg white and sprinkle with the demerara sugar. Cut three slashes into the top of each cake.


8. Bake in the oven for 15 minutes.

The resulting cakes were a pleasing golden colour, and the pastry was very light (I can't take the credit for that unfortunately, but I shopped wisely!). The filling of spiced fruits made me think ahead to Christmas and mince pies hot from the oven, and I felt that I had got the proportion of filling to pastry just right. Some of my cakes had open bellies where my pastry crimping had come loose, which meant the fruit all fell out mid-way to my mouth. If I were to make them again I would keep an eye on this, or eat faster.

Saturday, October 15, 2005

Dorset Apple Cake


It is apple season in Britain now, and for that reason I thought I should look out an apple recipe to test. It is also a good incentive to search out the more unusual varieties of native apple. Unusual in the sense of hard to find, thanks to the way that supermarkets operate (although consumers should recognise their own responsibility to demand a broader range of varieties). I did a quick lunch-time apple shopping test at Marks & Spencer and Waitrose - both of whom claim to support British producers. Marks & Spencer disappointingly could only offer Royal Gala, Cox and Bramley apples grown in England (pretty standard fare that are easy to obtain from all large shops). They had other varieties too, but these came from France and Australia. Waitrose however scored much better. In addition to Royal Gala, Cox, Bramley, they had Spartan, Egremont Russet, Early Windsor, Regal Prince and Meridian apples. All were grown in Kent, so have come a short distance up the road to be sold in London. Of the varieties sold in Waitrose, and grown in Kent, not all are native to Britain - for example, the Regal Prince was first discovered in Angers, France.

Clockwise from left: Early Windsor, Egremont Russet, Meridian, Regal Prince:


In Dorset, the areas around the towns of Bridport and Beaminster have a soil which particularly suits apple growing. Cider is made from some of the apples grown in the county, and in the past was used as a necessary supplement to farm labourers' wages.

Each year in October is held an Apple Day, to celebrate the season for best enjoying home-grown fruit. By complete coincidence (no, I am pretty sure that they haven't held it now to coincide with my Blog posting) in Dorset this year's celebration is being held today (15th October) in Symondsbury. 2005 has been designated Heritage Orchard year. For more information on events during October to celebrate English apples, click here.

There are many recipes for Dorset Apple Cake, as it seems to be one of those recipes which people find their own way with. As I have never tasted anyone's interpretation of the recipe, I have gone with the advice of a long-time Dorset resident, Marion Watson, who writes on The Great British Kitchen website that, 'most traditional recipes are based on the rubbed-in method mixed with milk to give a rather scone-like mixture.' My recipe comes from a page on Dorsetshire.com, and it follows the method just described (I am not sure if the rabbit custard recipe on the same web page would be a good accompaniment to the cake - I think probably not).

225g plain flour
1-2 teaspoons of baking powder
1 teaspoon of ground nutmeg
pinch salt
110g butter, cut into small pieces
110g caster sugar
225g of peeled and diced apples (I used two smallish Early Windsor dessert/eating apples)
1 egg, beaten with 2 tablespoons of milk

1. Preheat oven to 180C/350F/Gas 4
2. Grease and line a square cake tin (I used a 20cm by 20cm square cake tin)
3. Sift the flour, baking powder and spice into a bowl, add the pinch of salt
4. Rub the butter into the flour mixture,
5. Stir in the sugar and the diced apples. Then add the egg and milk. Mix in to form a firm dough.
6. Fill the cake tin - the mixture will be quite shallow in the tin.
7. Bake for up to an hour - my cake was ready in 45 minutes,
8. Leave to cool in the tin.


Whilst my cake was baking I put to the test another bit of information that I had gained on English apples. The Egremont Russets which I had bought from Waitrose are part of a group known as russets because of their distinctive matt/rough golden skins. Russets have a nutty tannic flavouring which once made them popular as an after-dinner accompaniment to port. Well, frankly I didn't need to be told that twice before I poured myself a large one, and cut up an apple to eat alongside. Fantastic! If you like port, then try it for yourself.


The cake didn't rise very much, which was fine, but it would be interesting to see the difference that using self-raising flour would make. The sponge was fairly dense and reminiscent of scone consistency. My taster and I agreed that the cake was a little too subtly flavoured, and that it could easily have had another one, if not two, apples added to the sponge base. The nutmeg spicing was a little indistinct, although this could be more a matter of personal taste. I also felt that this could be served warm with thick cream or (non-rabbit) custard. YUM!

Remember what an apple a day does...
(...and I'm sure that a glass of port can't be bad either)

Saturday, October 08, 2005

Bara Brith - a Welsh fruit cake


Welsh language for beginners:

Bara means bread, and brith means speckled. So, Bara Brith means speckled bread. 'Os gwelwch yn dda' is 'if you please'. With your new linguistic abilities you can go into any bakery in Wales and order this national classic. The name Bara Brith was originally used in north Wales only. In the south, the name Teisen Dorth was used (teisen means cake, and dorth/torth is loaf). Bara Brith is eaten throughout Wales and is readily available from tea-rooms, cake-shops and food markets. I lived in south Wales for a few years, so have sampled one or two in my time!

Although Bara Brith is referred to as a cake, it is, as its name suggests, a bread. In the days before baking powder and other chemical raising agents most 'cakes' were in fact fruited breads. In this instance the bread is 'speckled' with currants, sultanas and dried peel.

My recipe comes from a book called 'Welsh Country Cooking', by Chris Grant. This book record recipes handed down from the author's great-grandmother to grandmother to mother. I was a bit put off by the idea of including lard, but for authenticity used this instead of butter. When I weighed it out I realised that most cakes I make use a much greater weight of butter, so 20g of lard is not such a big deal. Maybe it's just the word I don't like - lard - say it aloud and clearly it is a substance that is heavy, joyless and cholesterol inducing.


Makes one large loaf (900g/2 lb tin):

275g strong white (bread making) flour
1 level teaspoon salt
20g lard
25g sugar (I used golden caster)
1/2 teaspoon of mixed spice (I didn't have a jar of mixed spice, so used allspice)
1 large beaten egg
1/4 pint/150ml warm water
20g fresh yeast (I used a 7g packet of dried yeast)
225g currants
125g sultanas
25g mixed peel

1. Grease your loaf tin.
2. Sieve flour and salt into large mixing bowl, add the dried yeast if using. Rub in the lard with your fingertips. Make a well in the centre.
3. Mix the sugar and spice together and put into the well.
4. Add the beaten egg to the warm water. If you are using fresh yeast use 3 tablespoons of this mixture to mix the yeast to a thin paste, before adding the remainder of the liquid.
5. Pour the egg and water (and yeast) mixture over the sugar in the well. Mix the dry ingredient in with the liquid, then knead to form a smooth, elastic dough.
6. Mix your fruit in with the dough. (I had soaked my fruit overnight in tea to plump it up, and although I had drained it well mixing in wet fruit was a bit of a messy challenge. I had to use extra flour to lessen the stickiness of the dough.)
7. Put your dough into the loaf tin (or you can make a free-form loaf on a baking sheet), cover and leave to rise for 1 1/2 hours.
8. Preheat oven to 180C/350F/Gas mark 4.
9. Bake for 30/35 minutes, covering top with a foil hat after about 20 minutes. Loaf is done when underside sounds hollow when tapped (I just guess, as I have problems turning a piping hot loaf out of a tin).


This cake/bread gave off spicy and delicious smells whilst baking, and whilst cooling on a baking rack scented the rest of my flat with the same hunger inducing scents. Please only bake this after eating.

Fortunately my guess that the loaf had cooked fully was correct, and after waiting an age for it to cool it was ready for photography and sampling.


The loaf had a good weight, and felt moist rather than dry like a unfruited loaf. The slices cut neatly without the loaf crumbling away, demonstrating a good firmness. The crust on the top of the loaf was thin (rather than crusty) due to the fact that I covered the top up part of the way through the baking time. I have made fruit breads in the past and not shielded the top, ending up with a scorched crust with embedded charred currants - not so good. The Bara Brith was delicious, and didn't really need the addition of butter, however the butter currently in my fridge is Welsh so it seemed to make sense use it.

Blasus!

Monday, September 26, 2005

IMBB # 19 - Vegan Fudge Cake


A divergence from my traditional British baking; but not too far astray... With thanks to Becks and Posh for hosting the event.

First rule of cooking vegan is to concentrate. I got home from work, turned the oven on in readiness for my cake, and then went to the fridge to get the eggs out to bring them to room temperature. EGGS. Eggs have clearly no place in vegan cakes, and if one slips in then the game is over. Fortunately whilst sieving the flour (innocuous) I looked over at the carton and realised my mistake. Daft thing is that the main reason I wanted to take part in this IMBB event was to see how a cake turns out without eggs. I've made dairy-free cakes in the past, but never omitted all animal ingredients. To me a cake should be stuffed full of lovely ingredients such as eggs, milk, butter - all nice natural products and if bought from the right sources not too unfriendly to animals (I hope). This is a test to see how good a cake can be if it doesn't include any of these 'key' ingredients, and to see if it passes muster with my tasting panel.

My recipe comes from Oxfam's website, and is to promote their Fair Trade merchandise - Vegan Fudge Cake.

Having regained my concentration, I was a bit perturbed when reading through the recipe method to see soya flour included in the list of dry ingredients to first put together. No mention of soya flour on the ingredient list. Don't PANIC. Blimey, looks like a lot of water to add to the dry ingredients; are you sure that this isn't going to be a chocolate soup? A quick consultation of a few recipe books later, and I decide that the proportions of self-raising flour to sugar to fat look OK. Decide to add the water half at a time, and if all goes soupy add a little more flour. Proceed with caution (easy on the vinegar - I think this reacts somehow with the baking powder - could be wrong). Phew, looks fine.

Into the tin and into the oven. I baked for 25 mins as the recipe suggests, and then a further 10 minutes with a tin foil 'hat' on (the cake, silly), to prevent charring. Cake was pretty damp still after 25 minutes, but had a good looking crust to the top.


The fudge topping was a doddle to mix up, but as I had made a loaf cake I only used half the quantity of ingredients compared to the recipe. You need to keep whisking the icing until it thickens sufficiently to apply to the top of the cake. The (soya)margarine content means that the fudge icing keeps a nice gloss even when it has cooled completely.


So what did my tasters think? As the dish was pretty obviously a chocolate cake, I asked the tasters if they could determine what was missing from the cake. They were a little bit suspicious, but to be fair I am not sure that you could have spotted the lack of milk, butter of eggs from the appearance or the taste of the cake. The sponge rose nice and high, and the consistency was light and fluffy, with a good moistness. I thought the sponge was a little lacking in favour and would have been more tasty with a bit more cocoa powder added (or melted chocolate). However as the fudgy icing was so rich, the lack of strong flavour in the cake was not really too much of a problem. All in all I was pretty impressed by my animal-free baking. Eating vegan is obviously a piece of cake...


I some post-baking research about the combination of baking powder and vinegar. Baking POWDER needs a liquid to make it active, where as baking SODA need an acid such as vinegar to get it going. Although baking powder does contain a small amount of baking soda (sodium bicarbonate), the water in the Vegan Fudge Cake recipe should have done the job of activation, so I am not convinced that the vinegar was really necessary. At least it didn't impart a fish'n'chip tang to the cake. Stephanie Jaworski explains the job of baking powder and soda so clearly on her Joy of Baking website, that it is best to read it for yourself if you are interested in learning more. Also, check out Bobby Thompson's site for more imaginative ideas for demonstrating the reaction between baking powder and water. I shall be buying a baking powder submarine directly.


+